Can I Use a Wooden Rolling Pin for Sheet Vinyl
Welcome back to another Home Flooring Pros do it yourself "How-To" where we offer you tips and tricks to complete various flooring projects from installation to removal. This week…how to install vinyl sheet flooring.
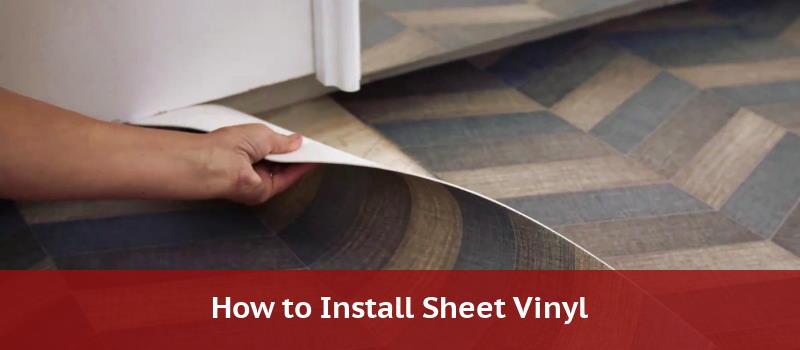
Today's vinyl sheet flooring gives you any look you want from wood to tile to stone. It is affordable and reasonably durable.
Yet the search goes on for the answer to the age-old question: What is the easiest Do It Yourself vinyl flooring installation? If it were easy to Do It Yourself, everyone would Do It Themselves!
Fortunately, due to its one-piece construction, vinyl sheet flooring offers fairly easy installation for the handy homeowner. It's not quite as easy as unrolling the vinyl and gluing it down properly, but that's not far off.
In order to install vinyl sheet flooring the easiest way you'll need the following supplies:
Tools and Equipment Needed
- Mop/broom/dustpan
- Hand saw
- Circular saw
- Caulk gun
- Trowel
- Pry bar
- Hammer
- Straightedge
- Rolling pin
- Heavy paper/marker
- Floor filler
- ¼" underlayment
- 7/8" staples
- Level
- Power sander (Optional for
- Tape
- Utility or flooring knife
- Vinyl adhesive
- Vinyl sheet flooring
- Wood putty
- Paint (interior, wall)
Step 1: Prep the Room
Remove all furniture, rugs, and décor from the room. Remove baseboards with a pry bar (click here for baseboard removal). Remove all fixtures, like toilets and pedestal sink bases. Vinyl sheet flooring can be installed over almost any clean, dry surface, including concrete and existing flooring. If you have questions about the current subfloor, check with the sheet vinyl flooring manufacturer or retailer for specific installation instructions.
Pro Tip: Use the marker to number baseboards for easy replacement.
Sweep the floor clean, mop if necessary. Let the floor dry completely. Check the level of the floor; fill any low spots with self-leveling concrete filler.
Step 2: Create a Paper Template
Tape heavy paper onto the floor of the room. Something like this brown builders paper works well.
Leave about an extra inch along all the edges. Cut out holes for the fixtures. Hold the straightedge along the sides of the room and trace the room edges onto the paper. Remove the paper.
Step 3: Install a Base Layer (Optional)
If the underlying floor has imperfections, they disappear with this step.
Install a layer of ¼" plywood underlayment over the existing floor. Tape the paper template to the plywood underlayment. Rough cut the plywood with a hand saw; finish with a circular saw. Staple or glue the plywood in place. Pull and replace staples or gently pound them down; They must be flat to the plywood or very slightly below the surface.
Smooth the surface with troweled floor filler, and power sand as necessary. Occasionally this type of plywood comes with wood burrs or rough tops that need TLC. Keep in mind that vinyl flooring "telegraphs" imperfections through to the surface, so the smoother the base, the better.
Pro Tip: Be sure the plywood is underlayment grade, manufactured specifically for use with vinyl floors.
Step 4: Apply the Template
Roll out your vinyl on a clean, dry and smooth surface like the garage floor or driveway.
Lay the paper template on top of the vinyl, and tape the edge – that extra inch or so you left outside your wall line – to the vinyl.
Step 5: Cut the Sheet Vinyl Flooring to Match the Paper Template.
Trace the template onto the sheet vinyl flooring. Carefully position the flooring pattern or image for the best installed appearance.
Cut the vinyl according to the template using a very sharp utility knife or flooring knife.
Step 6: Glue Down the Sheet Vinyl Floor
Clean off any debris on the underside of the freshly cut vinyl it might have picked up in your garage or from the driveway.
Roll up the sheet vinyl floor. Place it in the new room, unroll it, and check the fit.
Trim the sheet vinyl flooring where necessary using the knife.
Fold the vinyl in half – in on itself, print layer to print layer.
Use the trowel to spread the adhesive on half of the bottom side of the sheet vinyl flooring according to manufacturer instructions – either fully glued or perimeter glued.
Position the glued half properly in place. Repeat the gluing process on the other half of the sheet vinyl flooring, and position it properly in place.
Pro Tips: Use the correct amount of adhesive, like Goldilocks would. Not too much – it will leave bumps in the floor; Not too little, or the flooring might come up. Apply the adhesive completely to corners and crannies.
Use the rolling pin to smooth out the floor as soon as possible after the sheet vinyl floor is glued into place. Start in the middle and work to the outside, applying steady pressure so the adhesive underneath distributes evenly.
Step 7: Finish the Sheet Vinyl Flooring Installation
Replace fixtures and baseboards. Sweep the room clean. Fill baseboard nail holes with wood putty. Touch up the baseboard appearance with matching interior paint. Caulk fixtures as necessary (commonly, caulk is used around bathtubs, showers, sink and cupboard bases, and toilets.) Replace furniture.
Keep it Looking Good
For a great looking sheet vinyl floor that will last for years, use protective pads under chair and table legs, and don't wear high heels when walking in the room. Cover the sheet vinyl flooring with planking or plywood when moving heavy furniture or appliances. Keep it free of abrasive grit. Maintain the sheet vinyl flooring with cleaners according to manufacturer's recommendations.
Related Posts
How to Stagger Vinyl Plank Flooring
How to Remove Vinyl Flooring
How to Cut Vinyl Plank Flooring
How to Clean LVP Flooring
Can I Use a Wooden Rolling Pin for Sheet Vinyl
Source: https://www.homeflooringpros.com/how-to-install-sheet-vinyl/
0 Response to "Can I Use a Wooden Rolling Pin for Sheet Vinyl"
Post a Comment